
Splitting Revision tables in Revit
By Jet de los Reyes | Redstack Applications Engineer - AEC
Have you heard people say “My Revision table is too long, I have to split it!” or “It won’t fit on my titleblock.”?
Normally we would include the revision table within our titleblocks. However, there is a road block that we normally encounter and that is, all revisions will not fit in just one table. Revisions tend to grow over time, and it will be difficult to keep track of it if unless we efficiently do mark ups on our drawings.
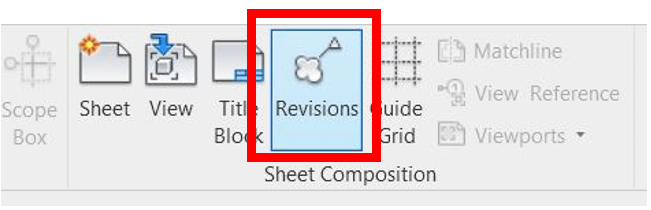
As we know, Revit has a cool feature called Sheet Issues/Revisions (View tab > Sheet Composition panel > Revisions) which helps us monitor all our revisions in the project (see figure 1). However, for our revisions to be visible on Sheets, we need to create a schedule.
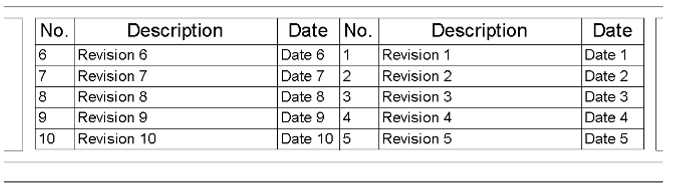
Figure 1
This might sound like a daunting task. Well, worry no more as we are here to guide you on how to split Revision schedules to effectively manage them. Towards the end, you will be comfortable on manipulating the Revision schedule to achieve your desired outcome.
We understand the pain and frustration when you want something to work but it just would not let you. We’ve been through that; thus, we are sharing this guide to assist you. With the help of Schedule, we can introduce certain formulas to restrict which revisions will be displayed and which ones will be filtered out. This guide assumes that you already have a sound knowledge on how to create a schedule. We will only focus on the part where we need to create multiple schedule by using conditional formulas.
In this exercise, I have already created 15 revisions in my project file and we will group them by 5 so we can split our Revision table into 3 groups (see figure 2).
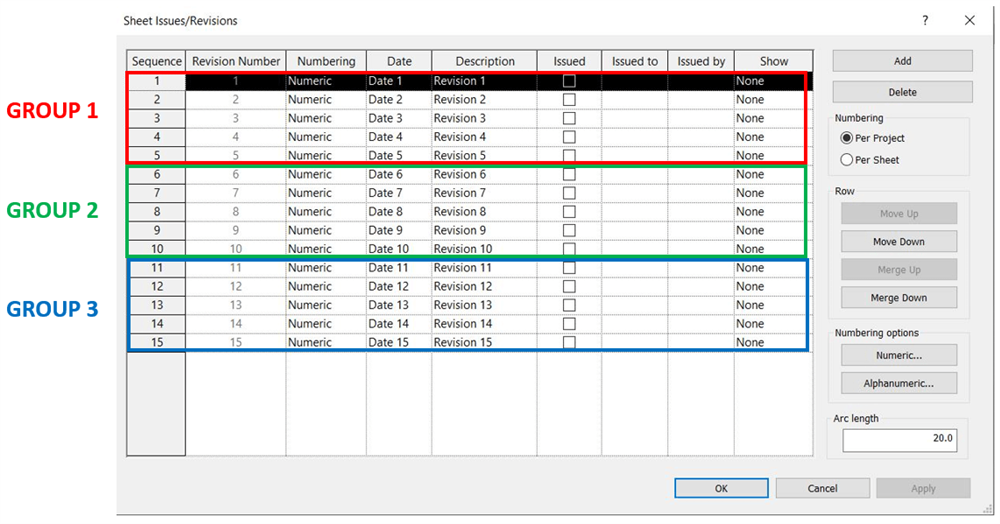
Figure 2
The height of the existing Revision schedule should be set to user defined (see figure 3). In this way, you can control how many revisions should be displayed. Let’s begin!
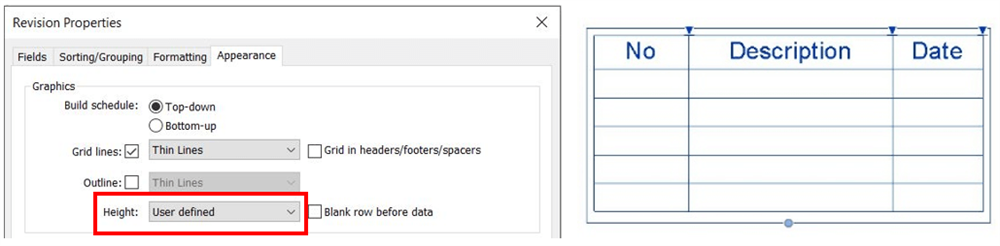
Figure 3
STEP 1: Open the titleblock family that you are using. In your project browser, select the existing Revision schedule and select Fields in Properties panel. Create a New Calculated Value with the following parameters:
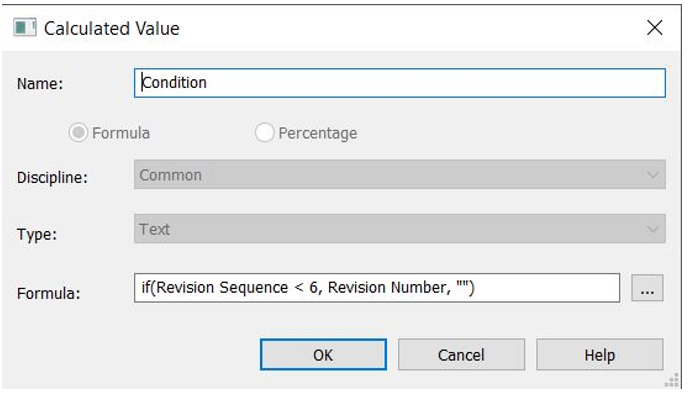
This will contain Group 1 Revisions.
STEP 2: Go to Sorting/Grouping tab and change Sort by to Condition.
STEP 3: Go to Formatting tab and make Condition parameter a Hidden field as we are only using this to filter out the revisions.
STEP 4: Create a new revision schedule and apply steps 1 to 3 then change the formula to if(and(Revision Sequence > 5, Revision Sequence < 11), Revision Number, ""). This contain Group 2 Revisions.
STEP 5: Create your last revision schedule and apply steps 1 to 3 then change the formula to if(and(Revision Sequence > 10, Revision Sequence < 16), Revision Number, ""). This contain Group 3 Revisions.
STEP 6: Load the titleblock family back into your project so you can test if the conditions will behave as expected. You also need to make sure other properties in your Revision schedule match so that you will have a consistent appearance.
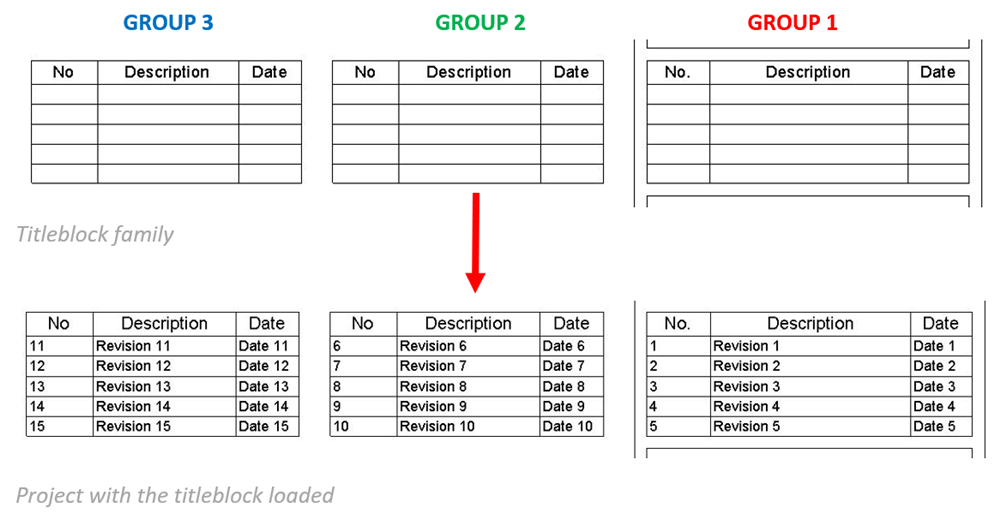
Your Revision schedule should automatically populate as soon as you load your updated titleblock family. By now, it reflects the correct grouping of your revision list based on the condition that you have entered under the new calculated value parameter.
You must note though that the number of rows you choose to display in your revision schedule should match the condition that you set. Say, if you decide to show 10 rows on your 1st revision schedule, your condition should reflect “<11” in order to capture revision numbers 1 to 10.
I hope that this blog will help you achieve the flexibility that you are looking for when creating your revision schedule. Feel free to subscribe to get updated on our latest blog posts: https://www.redstackshop.com.au/join-our-newsletter
Revit can be purchased as part of the Architecture, Engineering and Construction Collection here: https://www.redstackshop.com.au/autodesk-architecture-engineering-construction-collection